The Main Interface Screen
Previous posts ("Some Of Our Progress So Far/Second Pitch") explain in a broader sense to how all the pages are created. Here I shall explain how I refined my technique to fit our brief. Initially Callum would hand me a fully drafted drawing of the page/room. From scanning these images into my computer I trace over them as accurately as possible in Adobe Illustrator to give myself a plain outline of the room. These outlines provide my images with the cartoon-like appearance which helps me reinforce my aim to create clear and simple-to-understand illustration I discussed in my brief.
After tracing the images I import my new black outlines into Photoshop ready for painting. I colour the image by applying block colours to highlighted sections and applying gradient by using the burn and dodge tool. When looking at screens close up to add texture I'll experiment with some filter effects.

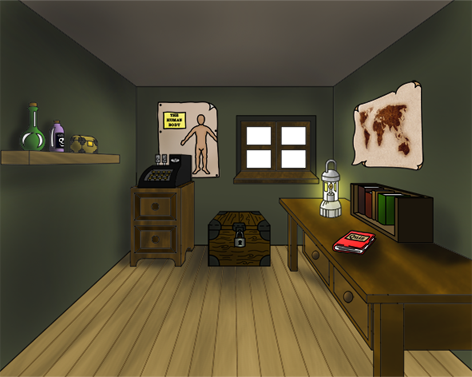
The main interface screen, fully rendered.

Me applying effects to create a wood-like appearance
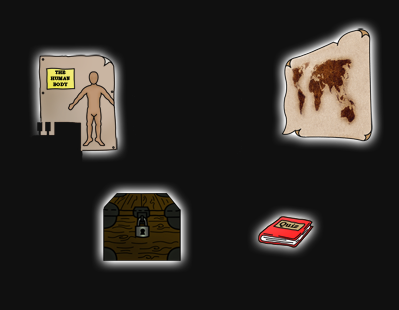
To create the glowing buttons I singled out the objects James planned to use on the main screen making everything else invisible and applied an outer glow within the blending options. I exported this on the full 1280x1024 resolution meaning James can just lay the image above the original image of the room and adjust the alpha channel creating the glow.

You may notice on the main interface image that I've left the window panes transparent. This will most likely appear black or white when embedded on the blog as it may not support transparencies of PNG files. By keeping the panes transparent this allowed me to create a 360x240 pixel video of rain that I created in Adobe Photoshop and Final Cut Express. How I created this was a mixture of "Fibers" and "Motion Blur" filters upon a black layer within Photoshop. By adjusting the position of the 'Rain' layer I could create the illusion of movement. I exported a series of 6 images that I could import into Final Cut Express and animate into a second long loopable video.
I used the same effect at a larger scale when creating the rain for the shop front introduction screen.
360x240 Rain Loop
No comments:
Post a Comment